If you’re looking to give your clients a stunning, glossy finish, wet look lash extensions mapping are a fantastic choice!
This trend is all about creating a fresh and dewy look that stands out. In this guide, we’ll explain what wet look lashes are, why they’re so popular, and how to achieve the perfect wet style lashes with an easy-to-follow mapping process.
Introducing Wet Lash Mapping
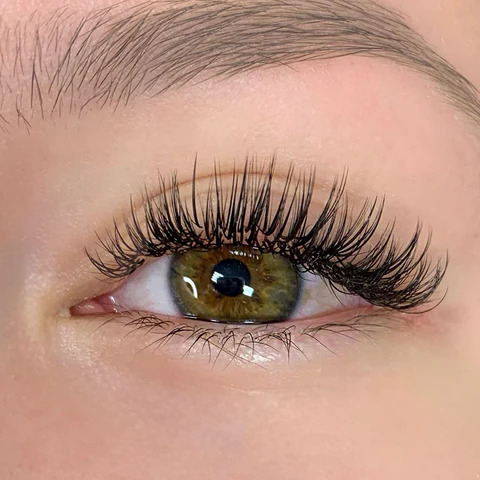
Wet look lash extensions mapping is a chic and glamorous way to enhance your eyes, blending the airy elegance of classic lashes with a bold, textured volume. Inspired by the retro “doll-look” trend and loved by stars like Kim K and Megan Fox, wet style lashes offer a more dramatic flair that many clients adore.
How to Create Wet Look Lash Extensions Mapping?
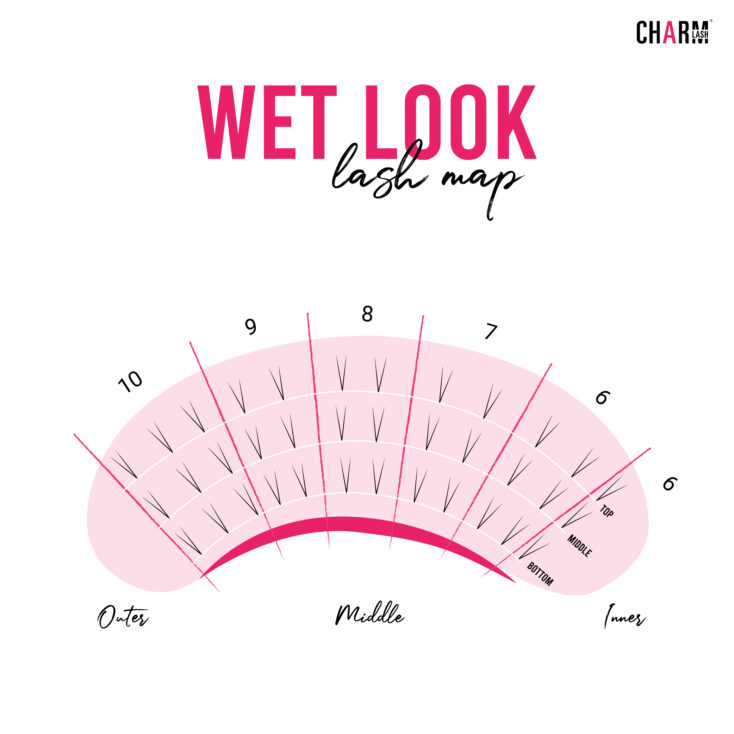
Wet look lash extensions mapping are crafted by using closed fans or spikes. You can create ‘spikes’ by keeping the fan almost closed, then applied to individual natural lashes. This lash map gives a fluttery, voluminous effect, making it ideal for those with a moderate to full lash line.
What Curls to Use for Wet Lash Style?
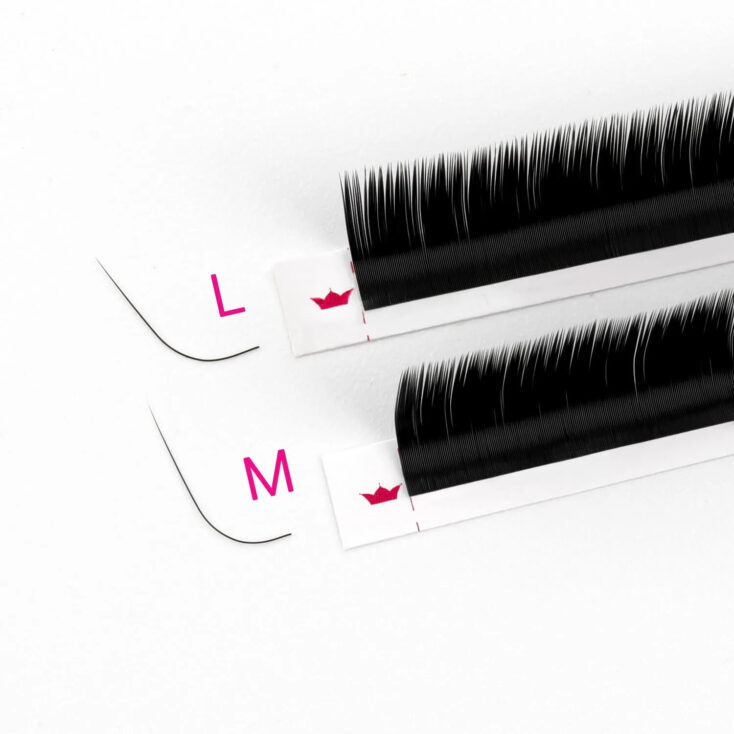
You can create ‘spikes’ for the wet style lash extensions by using curls like L, L+ or M curl lashes. Those are good options for clients with medium to full natural lashes. For sparse lashes, just be careful—the spikes might make gaps more noticeable!
Suitable Thickness for Wet Style Lashes
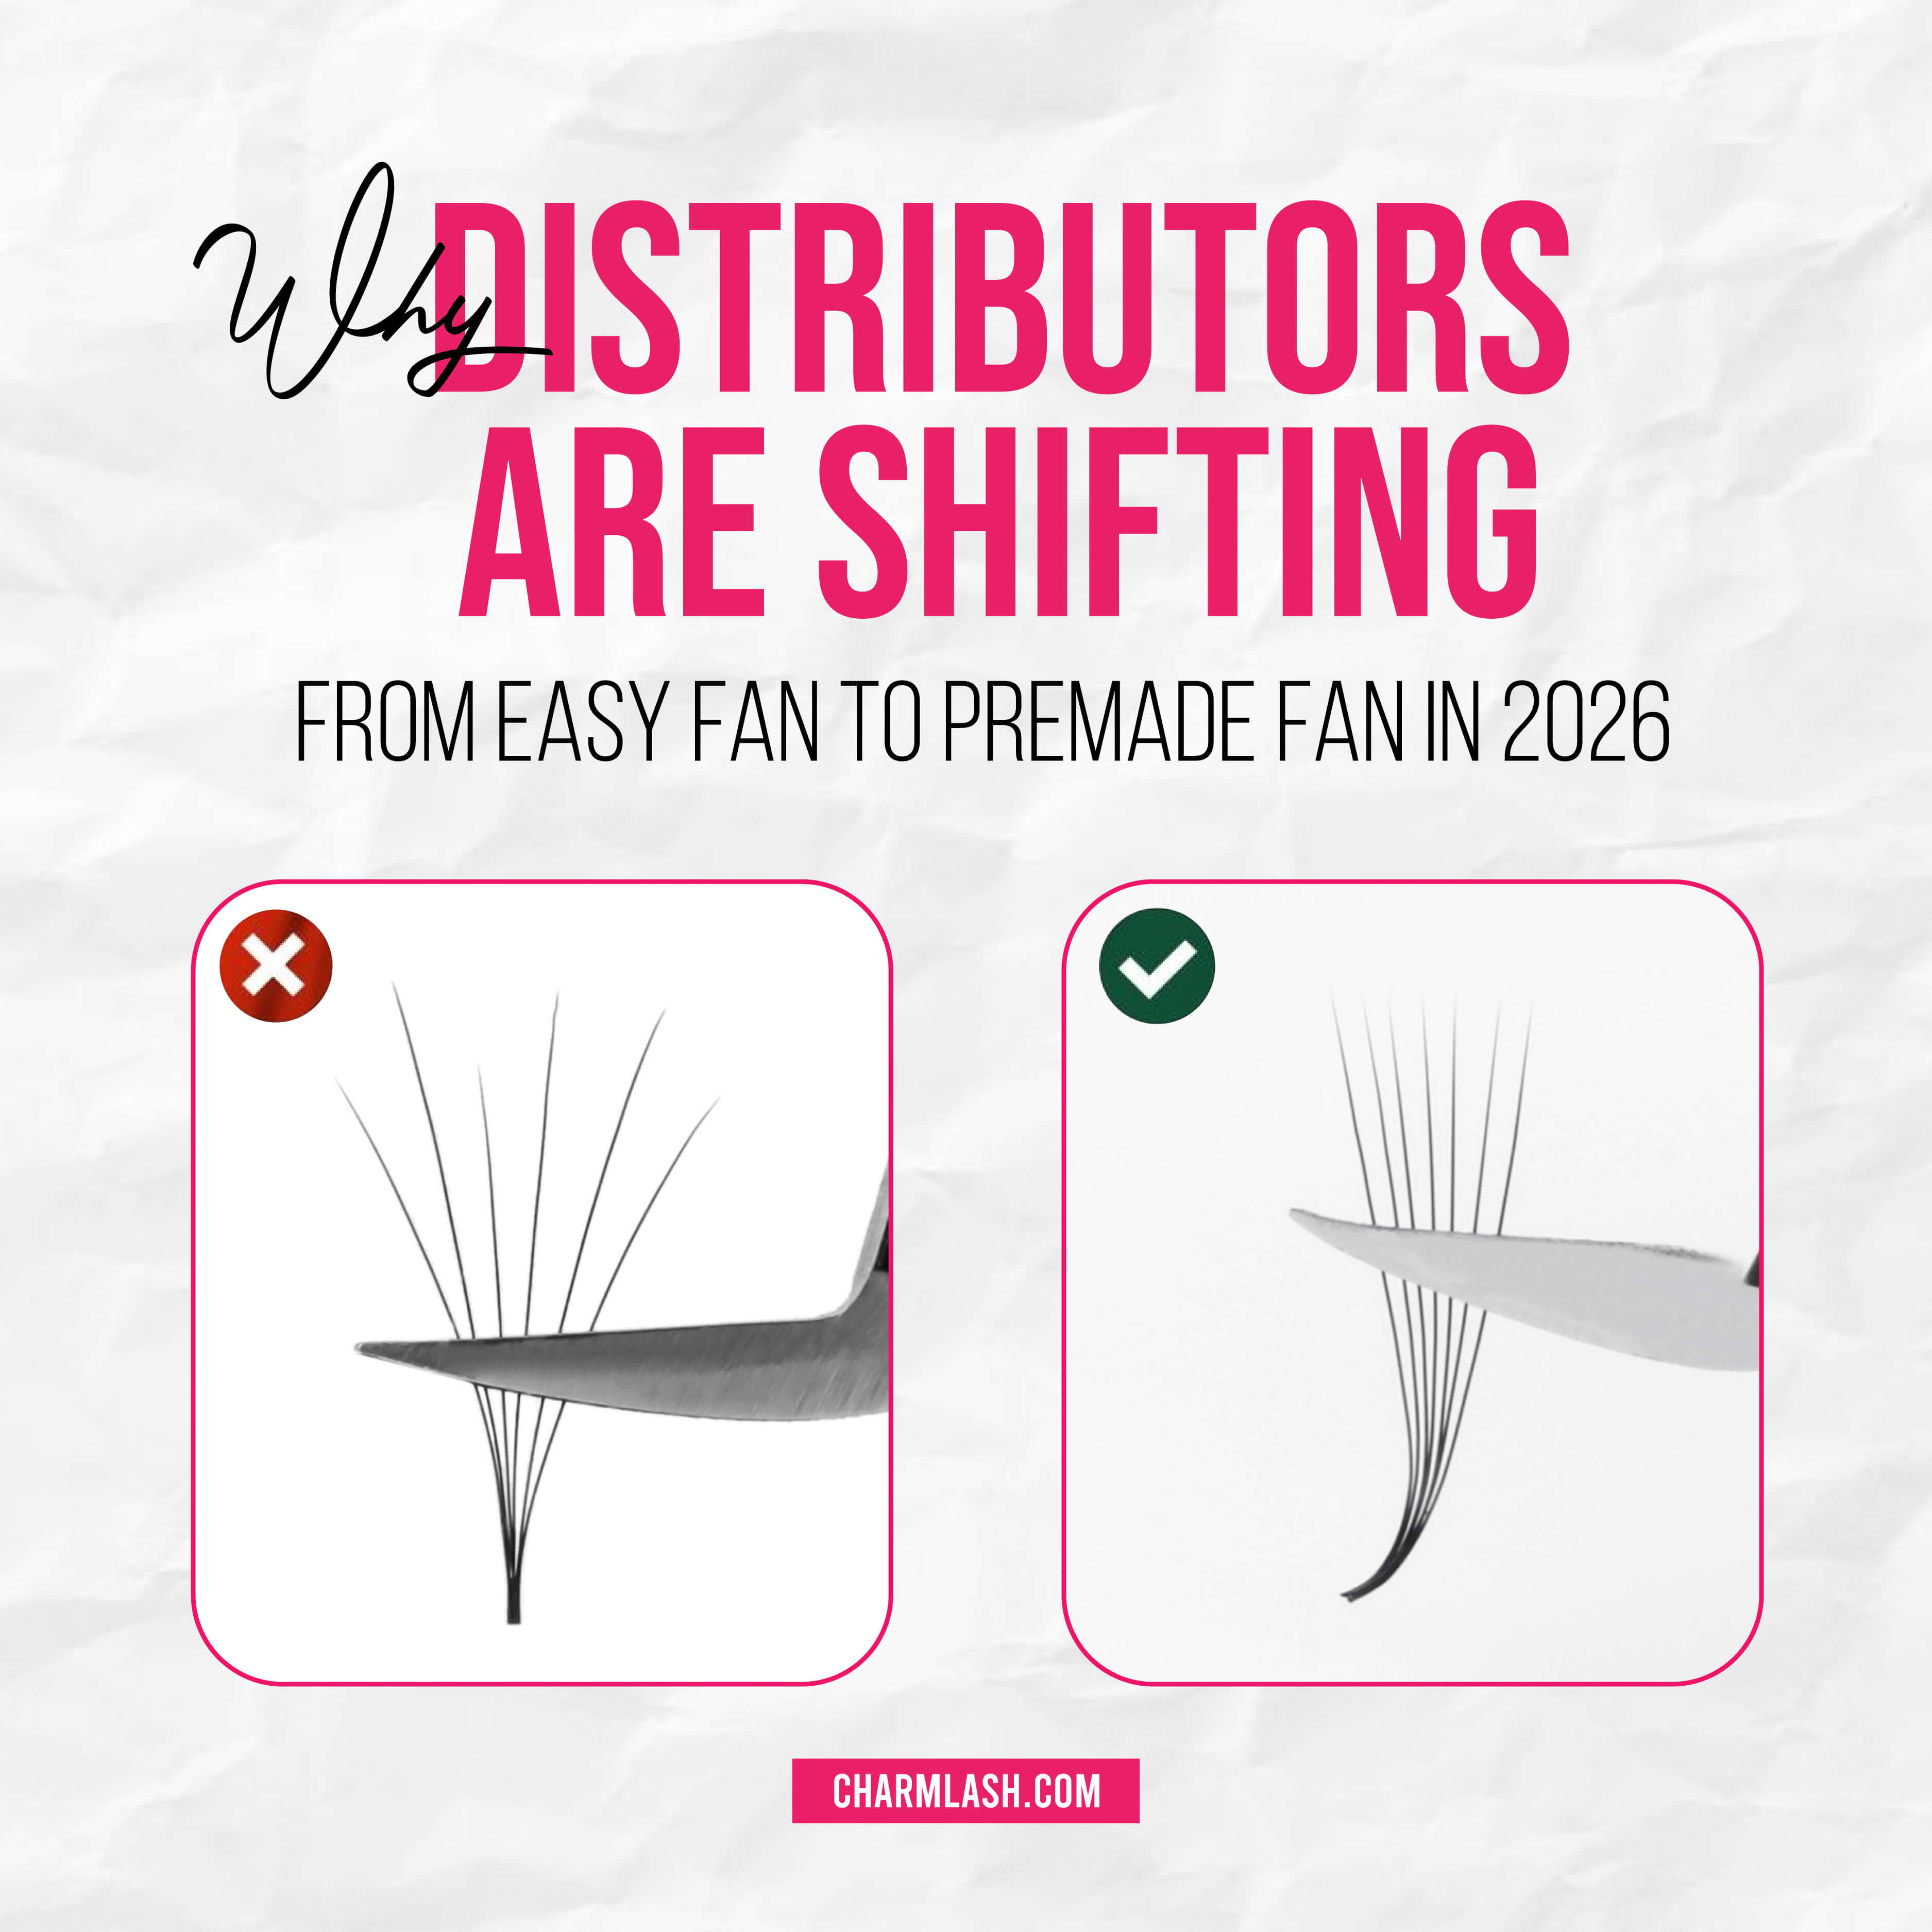
0.05 and 0.03 lashes are perfect for wet look lash extensions mapping as using lighter weights helps protect natural lashes while creating a closed fan effect. Or you can try our soft, lightweight Premade Spike lashes for a time-saving option.
How to Apply Wet Look Lash Extensions Mapping?
Wet lash look map is the secret to achieving a cohesive and symmetrical look with your extensions.
Let’s break down the lash line into sections: the inner corner, middle section, and outer corner. Follow this step-by-step guide to create a stunning wet look lash map that will dazzle your clients.
Layer 1: Bottom Layer
Begin by lifting all the lashes back with a piece of eyelid tape. Stick the tape to the upper eyelid at the ends, but don’t press down too hard in the middle. The tape should hold the lashes in place without flattening them too much. With these preparations complete, you’re ready to create a stunning wet look lash extensions mapping.
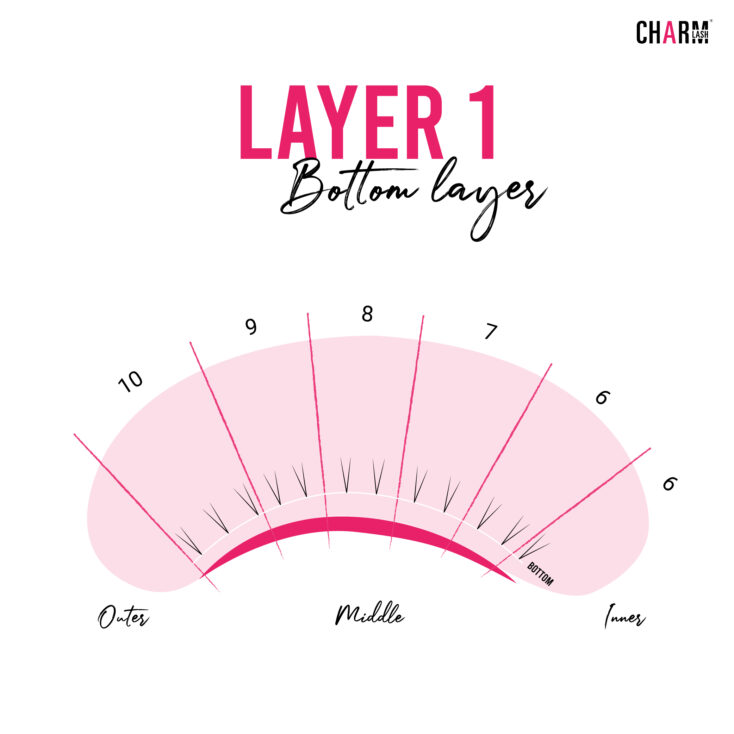
Use your isolation tweezers to separate and work on just the bottom layer of lashes. For a spiky, textured finish, apply closed lash fans to every single lash. If your client has sparser lashes, don’t worry—we’ll cover that soon. Stick to your shorter lash lengths for this first layer.
Layer 2: Middle Layer
Once you’ve finished with the first layer, apply some super bonder to the glue bonds. This helps the glue dry completely, avoiding stickies and preventing lashes from sticking to the eyepatches.Take another piece of tape to secure the bottom layer without pressing too hard—just enough to keep it out of your way.
Next, free the middle layer of lashes with your isolation tweezers. If your client has more than three layers of lashes, treat the middle layers as two combined layers to add density and make the spikes on the top layer pop even more.
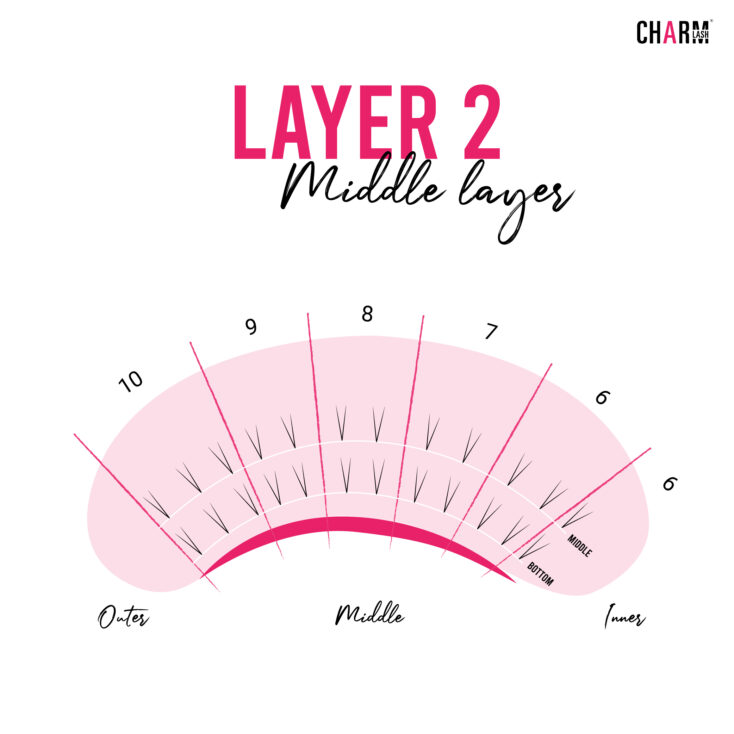
For the middle layer, use spikes that are 1 mm longer than the ones on the bottom layer if you want an extra textured look. For a subtler effect, keep the lengths consistent across all layers.
If your client has sparse lashes and you need more volume, add some open fans in between the middle layer lashes to fill in gaps without covering up those bottom layer spikes. Once you’re done, apply super bonder again. Tape down layers 1 and 2, and use the tape from the bottom layer to keep everything in place.
Layer 3: Top Layer
Finally, you can remove the tape from the eyelid. For the top layer, you can use lashes that are 1 mm longer than the middle layer or stick to the same length, depending on the look you want.
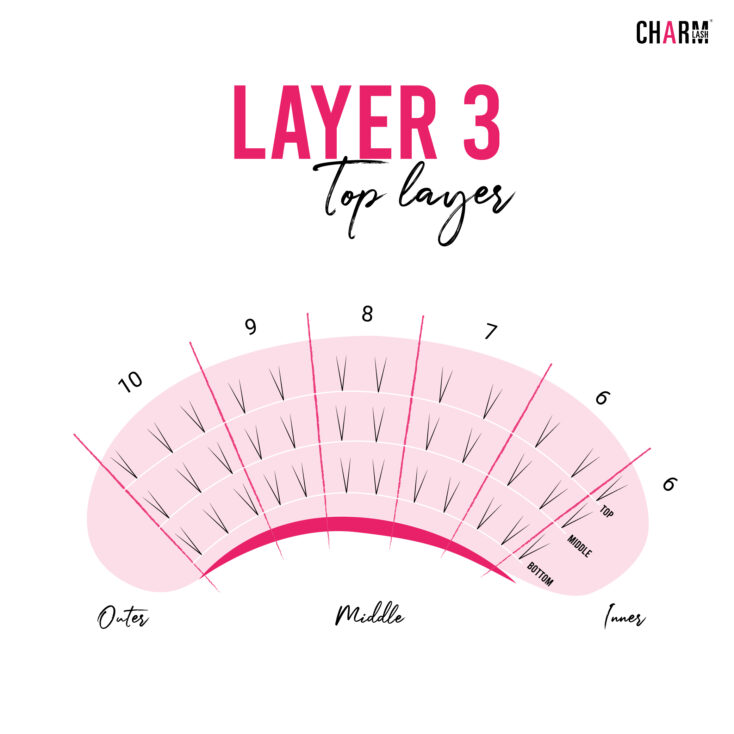
Finish up with your final application of super bonder, then remove the tape holding down the bottom layers. Give the lashes a brush through to blend everything beautifully!
Boom! With these steps, you’ll create a killer wet look lash extensions mapping that’s fresh, glossy, and seriously impressive.
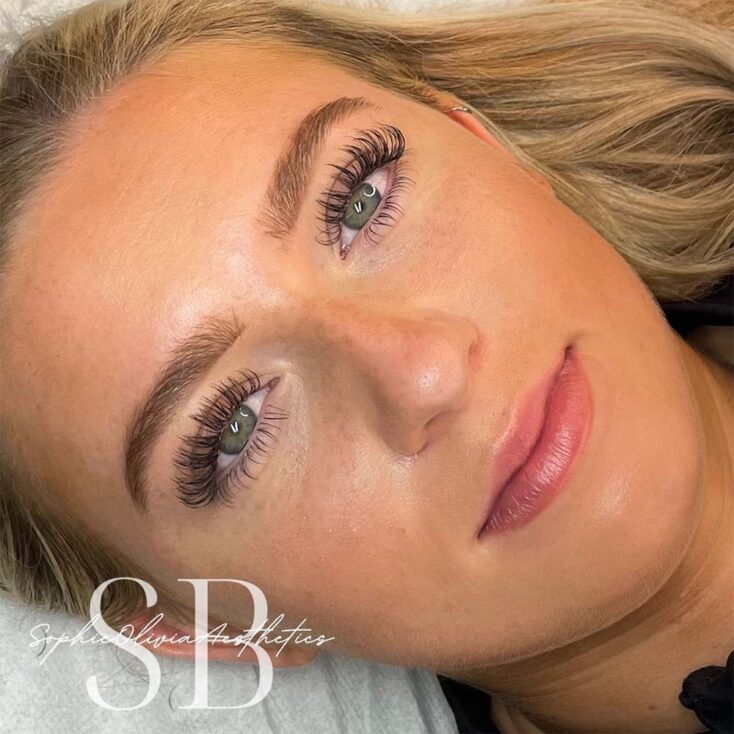
Source: Instagram @sophieoliviaesthetics
Who is Suitable for Wet Look Lash Map?
Who exactly can rock this trend? If you’re wondering whether this style suits your clients, here’s who will benefit most from this glamorous technique:
1. Clients with Healthy Natural Lashes: To achieve the wet look, which involves applying multiple lashes, the natural lashes must be strong enough to support the added volume and maintain their overall health.
2. Individuals Who Prefer Wispy and Textured Sets: This style, featuring closed lash fans, is a blend of classic and volume extensions, making it perfect for those with moderately dense to full lash lines.
3. Fans of the Kim K Lash Look: Wet set lash map is the combination of classic, delicate lash feel with some spiky, textured volume. If your client is all about that ‘Kim K’ vibe, they’ll love this look.
4. People with Medium to Full Lashes: A wet look set works best for clients with medium to full natural lashes, providing a voluminous and stylish finish.
5. Clients with Close-Set Eyes: For those with close-set eyes, using L or M curls in a wet lash set helps create an illusion of extended eye width, making the eyes appear further apart.
Wrap-up
Congratulations, lash fellows! You’re now equipped to create the ultimate wet look lash extensions mapping. Imagine their lashes sparkling with that fresh, dewy vibe—like they’ve just had a splashy, high-fashion makeover!
With your newfound expertise in wet look mapping, you can turn any set of lashes into a show-stopping masterpiece. So, roll up those sleeves, grab your tools, and prepare to create lash extensions that truly dazzle and shine!
Stay connected with us on Instagram for the latest updates and a daily dose of beauty inspiration!
MAYBE YOU WANT TO KNOW MORE:


