You have fully grasped the step-by-step lash application process, but when getting to work, you realize it is much more complicated. In fact, just attaching extensions to the natural lash requires quite a few rules to achieve a gorgeous-looking and long lasting lash set. In this blog, we will walk you through some key points for correct lash placement to reach perfection in lashing artistry.
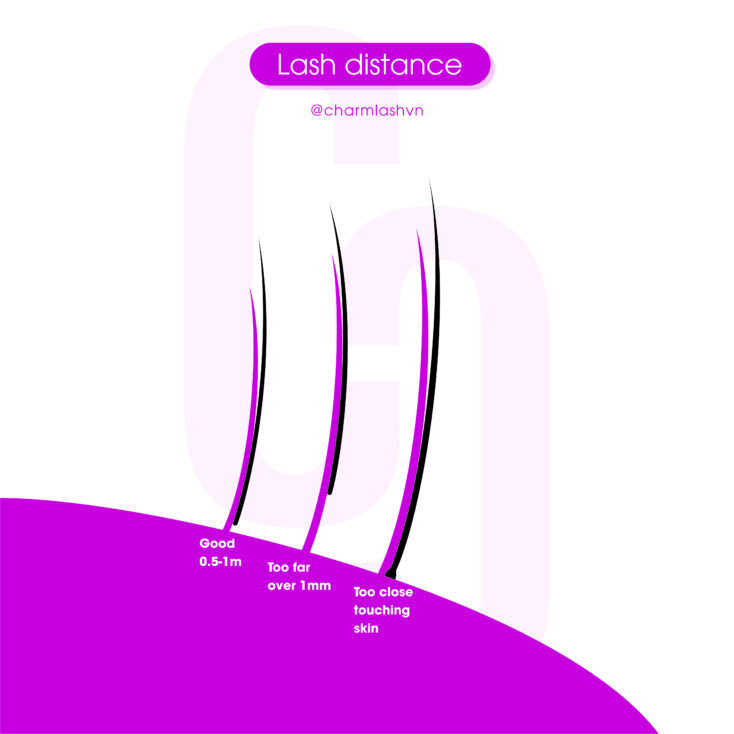
1. The ideal lash placement distance
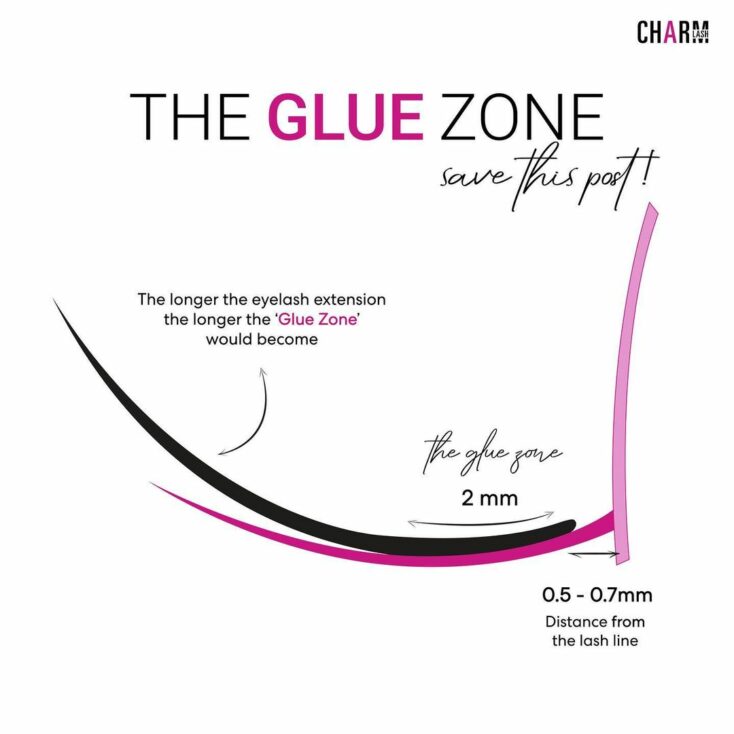
The lash extensions should always be attached 0.5 to 1 mm away from the eyelid for hygiene and lash health reasons.
If you place the lash extensions too close to the eyelid or even touch the skin (the gap is smaller than 0.5mm), the follicle and the skin area along your lash line can get irritated, leading to rubbing, swelling, and itching. Even a blink can make your client feel uncomfortable. This mistake also results in premature lash shedding and poor lash retention.
In addition, attaching lashes in the immediate vicinity of the lash line means there is a high chance the lash glue will expose the eyelid skin or, at worst, get into your clients’ eyes. As lash artists, we never want this accident to happen to our clients, do we?
On the contrary, if the lash extensions lie too far from the lash line (over 1mm), it can leave a visible gap on the lash set. The gap is an ideal place for oil, dirt, and residues to get stuck and burden your natural lashes.
2. The attachment area
Obviously, the larger the attachment area, the stronger the bond. Therefore, whatever lash type you choose, it’s worth noting that the minimum bonding area should be at least 2 mm to ensure that the lash extension is secured enough to not fall out too soon.
When coming across natural lashes that grow bent or sideways, it is better to skip them rather than attach extensions with poor retention. The simple reason is that they don’t have enough bonding surface to hold your extensions.
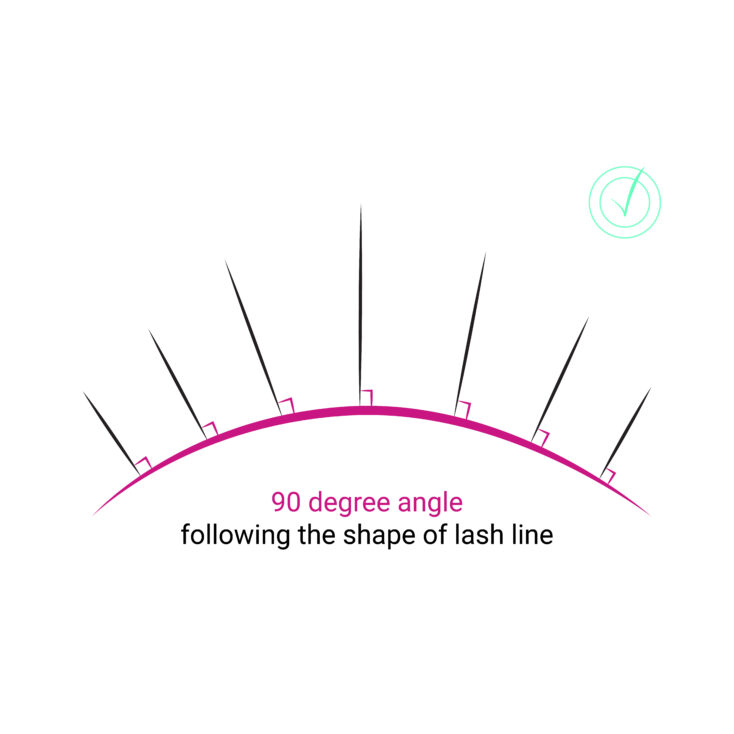
3. The lash extension angle
Usually, it’s highly recommended to place the lash extensions at a 90 degree angle from the lash line (not from the lash artist’s point of view). In some lash styles, such as cat eye or fox eye, the angle might need to be wider in the outer corner to achieve the elongated effect. However, the extensions attached from the inner corner to the center of the lash line should still be placed at 90 degrees.
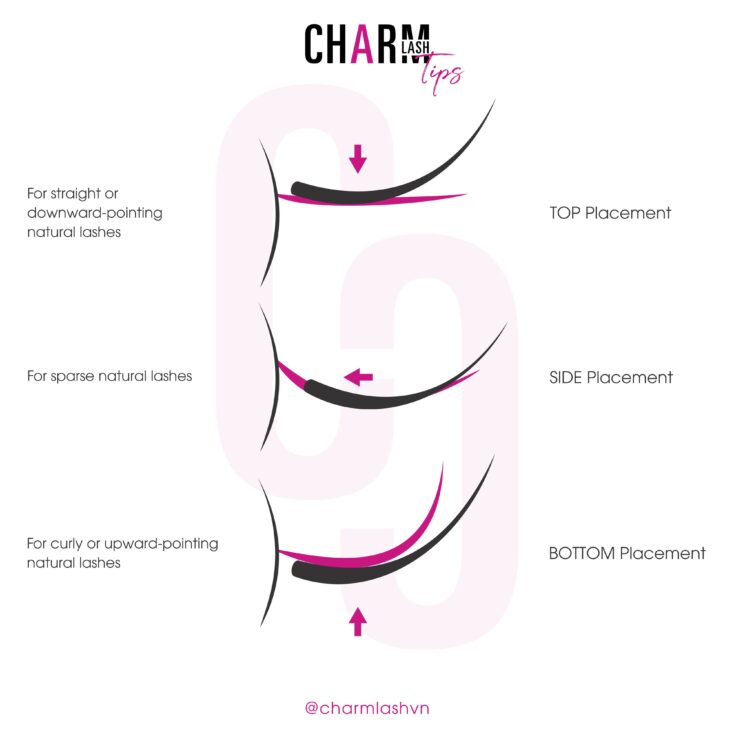
4. Top, side, or bottom lash placement?
The answer is: it depends on your clients’ natural lash state.
The top lash placement: best suited for natural lashes that are quite straight and point downward. This position accentuates the eye opening effect the lash extensions give your eyes. This benefit, as well as the easy attachment, make top placement the most popular method.
The side lash placement: This method is also a way to fill in the gap between the natural lashes; therefore, it makes your lash set look fuller. If your client has a sparse lash set, this method is the top go.
The bottom lash placement: Contrary to the top placement method, it’s better to apply lashes under lash line for those who have upward and curly lashes, so that the lash set won’t look overcurly or too fake.
Keep in mind that whatever method you use, the requirements of a sufficient bonding area and an appropriate distance from the lash line always need to be met.
You might want to know more:
How to become a lash technician? – Complete guide for beginner lash artist
How to lash faster – Useful tips every lash artists should know