In the world of eyelash extensions, safety and quality are paramount. As a lash artist, ensuring your clients have a comfortable and worry-free experience should be your top priority. One crucial step that often gets overlooked but should never be underestimated is the lash patch test. This simple procedure can make a significant difference in the well-being of your clients and the reputation of your lash business.
1. What is a patch test in eyelash extensions?
Patch test in eyelash extension is a way of checking whether your client is allergic to the products you are using in the lash treatment or not. Essentially, the process involves testing the adhesive, which causes most allergic reactions. Through various methods of assessing the adhesive’s compatibility with clients, lash artists can determine whether or not to apply the product to their clients.
More about: All about allergy to lash glue
2. Why is the lash test important?
For both experienced lash artists and beginners, the patch test holds immense significance. However, it’s particularly vital for those who are new to the lash extension world. Imagine the potential trouble and legal implications if a client were to have an allergic reaction during or after the procedure. This situation could result in harm, medical bills, and damage to your reputation. The lash patch test is your way of ensuring that your client won’t experience any adverse effects from the products you use.
3. When should you conduct a patch test?
A lash patch test should be performed before the client’s full set appointment, especially for those who are first-time clients or have sensitive skin. This helps you identify potential issues before committing to a complete lash application. It’s an essential step that demonstrates your professionalism and concern for your clients’ well-being.
4. How long does a lash patch test take?
A lash patch test usually takes anywhere from 15 to 45 minutes, which is sufficient for any immediate reactions to become apparent. However, it’s important to note that it depends much on the client’s physical health. Some take only a couple of minutes to find out, others need more time, even 24-48 hours.
4. 3 ways to perform a patch test
Before proceeding with a patch test, it’s essential to get to know your client. Ask them whether they’re new to lash extensions or if they have sensitive skin. This information will help you decide whether a patch test is necessary to ensure their safety and comfort throughout the lash extension process.
When it comes to patch test, there are 3 common ways to conduct a patch test
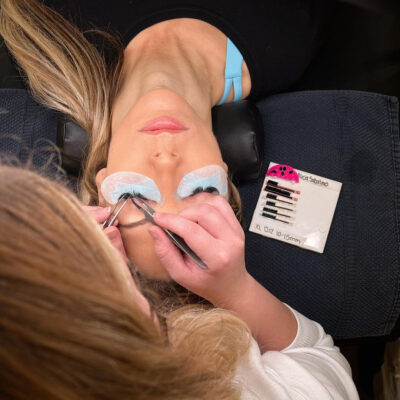
Applying a few eyelash extensions on the distal eyelashes at the outer corner
Placing a few lash extensions on the distal eyelashes at the outer corner of the eye is a commonly used technique. This allows you to observe how the client’s skin reacts to both the extensions and the adhesive. Use classic lashes only since it requires less lash adhesive, which make the Unforeseen allergic reaction less worse.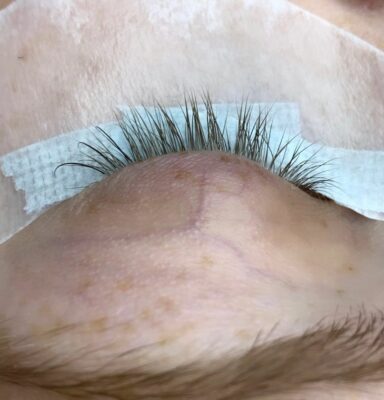
Applying a small amount of lash glue on the outer lashes
Some lash artists choose to apply a minimal amount of lash glue to the outer lashes. However, this method isn’t always recommended, as there’s a higher risk of the glue coming into direct contact with the client’s skin, potentially leading to irritation.
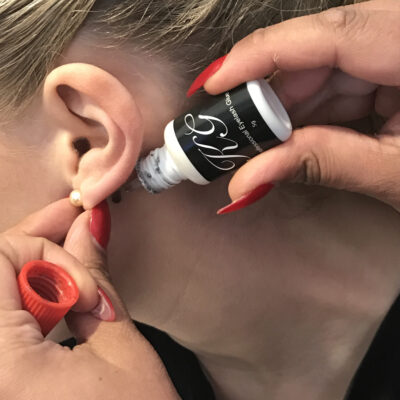
Applying a dot of lash glue onto the skin behind the ear
While it might seem convenient, applying a dot of lash glue directly onto the skin behind the ear isn’t the most reliable approach. It doesn’t offer a clear indication of how the client’s eye area will react to the adhesive.
4. What to do after the lash glue patch test?
After conducting the patch test, it’s time to interpret the results:
- No reaction: If the client shows no signs of irritation or allergic reaction within the observation period, you can proceed with the lash extension appointment confidently.
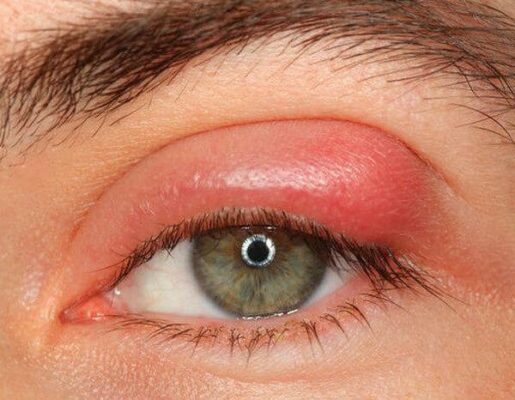
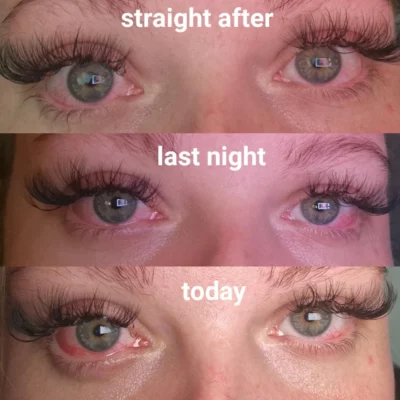
- Mild reaction: If the client experiences a mild reaction, it’s best to err on the side of caution. Remove the extensions and thoroughly clean the eye area to ensure no residual adhesive remains.
- Severe reaction: In cases of severe reactions, it’s recommended to suggest that the client seeks medical attention promptly.
6. The role of the lash patch test in client satisfaction
While a patch test isn’t foolproof and can’t account for every possible scenario, it is an indispensable tool in your lash extension toolkit. Its primary purpose is to reduce the likelihood of unexpected reactions during or after the procedure. By incorporating the lash patch test into your process, you’re demonstrating your commitment to your clients’ safety and overall satisfaction. It instills confidence in your clients, making them more likely to return for future appointments and recommend your services to others.
In conclusion, the lash patch test is a non-negotiable step in the lash extension process. It’s a proactive measure that safeguards both your clients and your reputation as a lash artist. While it can’t eliminate every potential risk, it significantly minimizes the chances of complications. As professionals, it’s our duty to prioritize the well-being of our clients and provide them with the best experience possible. Remember, a little extra effort at the beginning can go a long way in ensuring a successful and thriving lash business.
To learn more about lash tips, check out our Instagram @charmlashvn