Get the perfect spikes lash map with our simple, effective guide. Ideal for creating a textured, eye-catching look that enhances any lash set!
What are spikes lash?
Spikes are long individual lashes or closed volume fans that add texture to a set of lash extensions. Spikes regularly longer than the majority of lashes in the set and spaced evenly across the lash line. They can be placed in every lash set including classic, volume, and hybrid lash extensions.
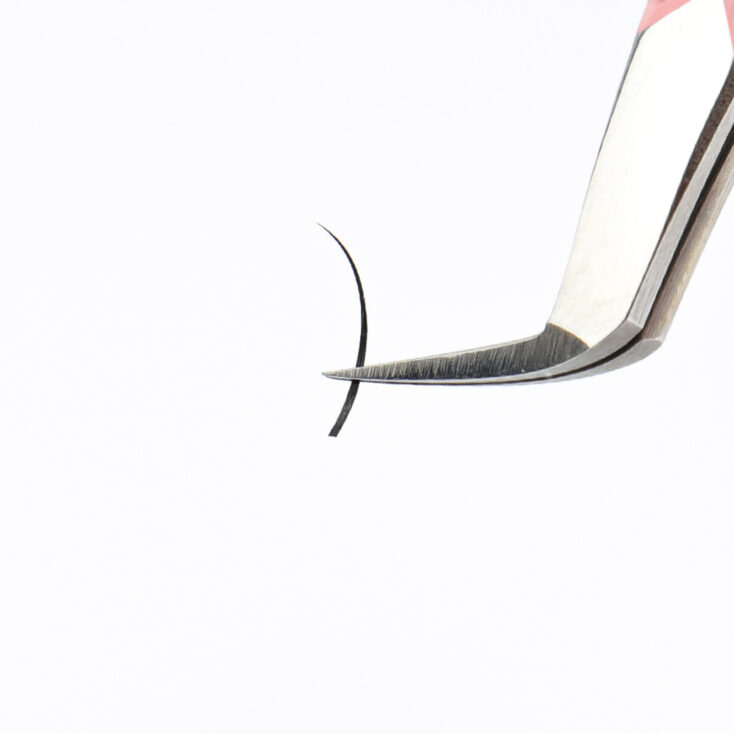
To create spikes with classic lashes, you simply need to integrate a few longer lashes into your set. Distribute these longer lashes evenly throughout the set to create a balanced, textured effect. For volume sets, you can use closed-volume fans that are slightly longer than the majority of your volume fans.
How to Make Spikes With Volume Lashes
There are two popular method for you to create spikes by volume lash extensions:
Primer Method
This method is ideal for those new to creating spikes:
What Materials are Needed?
- Lash extensions
- Micro brush
- Lash extension primer
- Tweezers
- Adhesive
How To Do The Primer Method?
- Step 1 – Separate With Primer: Apply lash extension primer to the tips of the lashes using a micro brush. This will help the lashes clump together initially.
- Step 2 – Remove from Row: Using tweezers, carefully separate a small clump of lashes from the row, ensuring they stay together without fanning out.
- Step 3 – Dip in Adhesive: Dip the base of your lash spike into adhesive, then gently wipe off excess glue on the ridge of your container or glue ring. This helps keep the base closed.
- Step 4 – Map and Apply: Place your lash spikes in a container for later use or use them immediately according to your desired lash map, such as a wispy or spiky map.
Watch full video to see how to create spikes using primer method:
Dipping Method
This slightly more advanced method is easier once you gain control with tweezers:
What Materials are Needed?
- Lash extensions
- Tweezers
- Lash adhesive
- Dispenser or glue ring
How To Do The Dipping Method?
- Step 1 – Grab Lashes on an Angle: Prepare your lashes, tweezers, and adhesive. Using tweezers, separate the desired number of lashes for your spiked fan and angle them to pinch them closed.
- Step 2 – Remove from Row: With tweezers pinching the lashes, carefully pull them forward and off the strip, ensuring they remain clustered.
- Step 3 – Dip in Adhesive: Dip the base of the clustered lashes into adhesive, then run them through the ridge on the outer edge of your adhesive dispenser to seal the bottom and ensure the spikes stay closed.
- Step 4 – Use or Save: Apply the spikes immediately or store them for later use.
Best Spikes Lash Map
There are various lash maps with spikes for you to choose from, each offering a unique look and effect. From bold, dramatic styles to softer, textured finishes. Exploring these options can help you achieve the perfect look for any occasion.
If you curious how to create a Spikes lash map, watch this video:
1. Anime Lash Map
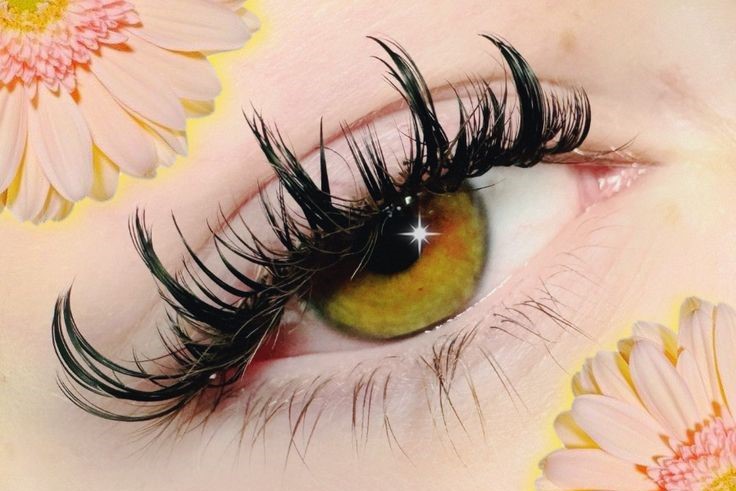
Anime lashes, also known as Manga lashes, feature spiky, individual lash strands that stand out more than shorter, feathery lashes. Unlike wispy lashes, the spikes in anime lashes are more distinct and noticeable.
Source: Pinterest
This style also highlights the lower lash line, creating a dramatic doll-eye effect reminiscent of female anime and manga characters. This lash extension style is sure to make your client’s eyes stand out.
2. Wispy Spikes Lash Map
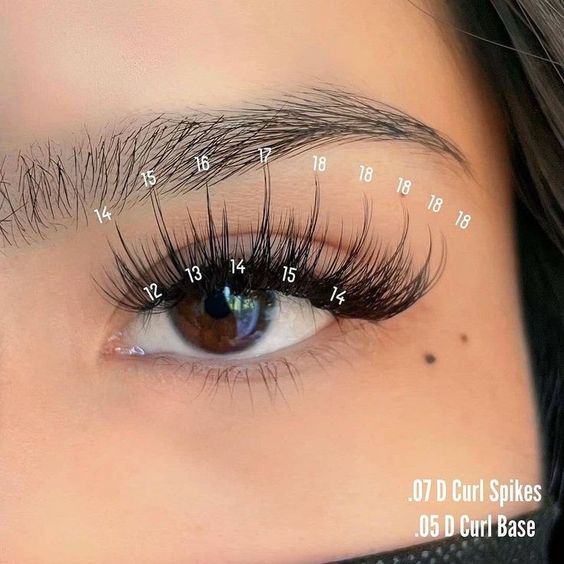
Wispy Spikes Lash Map uses a mix of individual lashes (closed fans) and lash extension fans with varying lengths and curls to create a textured, spiky appearance. This lash map is ideal for clients who want to achieve a striking, dramatic effect.
Source: Pinterest
3. Cat Eye Spikes Lash Map
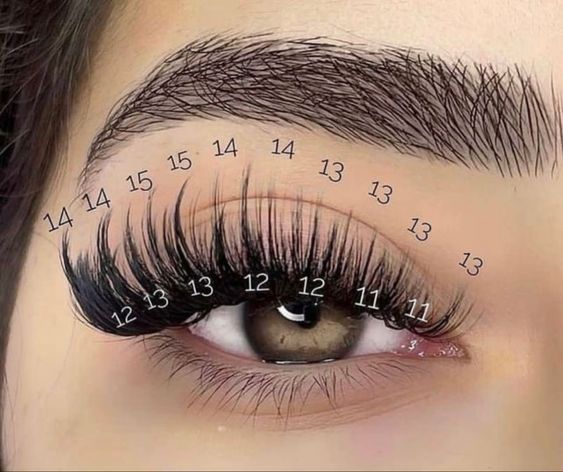
Cat Eye Spikes Lash Map or Cat Eye Wispy lash map emphasizes the outer corners of the eyes, creating a dramatic cat-eye effect with spikes. It’s ideal for clients who want a dramatic, winged look that accentuates the outer corners of their eyes.
Source: Pinterest @Gemerry Website
4. Doll Eye Spikes Lash Map
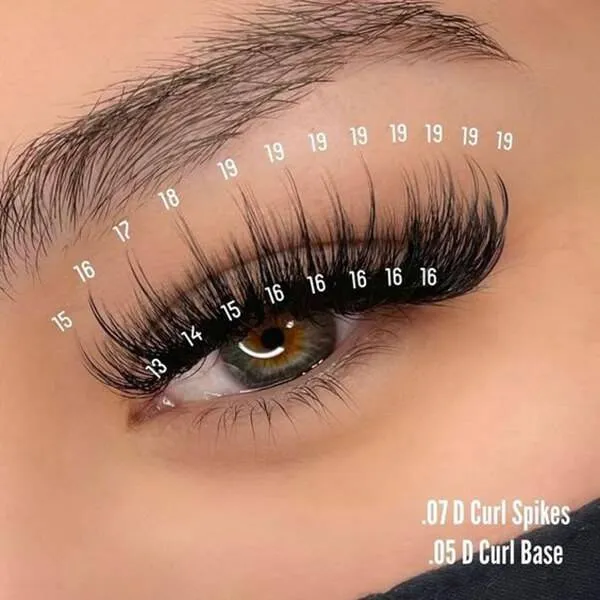
The doll eye spikes lash map is designed to create a wide-eyed, innocent look with spikes that enhance the central part of the eye. This technique places longer, spiky lashes in the middle of the lash line, creating a striking contrast with shorter lashes at the corners.
Source: Pinterest
This map is ideal for clients who want to achieve a sweet and captivating look, delicate yet impactful style.
5. Wet Look Lash Map
Wet look lash extensions mapping is a stylish and glamorous technique to enhance your eyes by using closed fans or spikes. This mapping style creates a fluttery, voluminous effect, making it perfect for those with a moderate to full lash line.
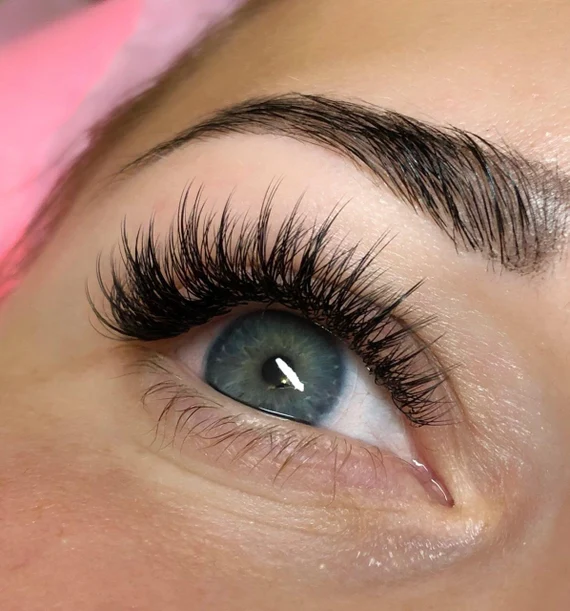
Source: Pinterest
Tips for Success with Spikes Lash Maps
What length to use?
When creating lash extensions, the length of the lashes you choose plays a crucial role in achieving the desired effect:
- Top Layer: Spikes should be approximately 3mm longer than the base layer.
- Middle Layer: Spikes should be -1mm shorter than the bottom layer.
- Bottom Layer: Spikes should be -3mm shorter than the spikes.
What thicknesses to use?
When choosing suitable thickness, ít’s best to use:
- 0.03mm Thickness: For a softer, more delicate spiked look.
- 0.07mm Thickness: For a cleaner, more defined spiked appearance.
What adhesive to use?
As a professional lash artist, it’s best to use fast-drying lash extension glue with a 0.5-1s second drying time. Our Magic Adhesive 0.5s is a suitable choice for creating a spikes lash map as it can speed up your application and offer strong bonding.
For beginners in lash mapping, opt for standard drying glue. This type of glue generally has a slower drying time of 2-5 seconds, allowing for more accurate application and ensuring the precise spikes lash map. It’s also a good choice for lash artists at all levels and techniques.
What material to use?
Opt for high-quality lash extensions that are both lightweight and durable. Synthetic fiber lash extensions are ideal for creating spikes, thanks to their flexibility and shape retention.
For more time-saving and easier application when making spikes lash map, you can consider using our Premade Spike lashes CC Curl – meticulously crafted to add depth and spiky, allowing you to customize looks that range from sophisticated to dramatic!
Conclusion
Choosing the best spikes lash map depends on the client’s desired look and eye shape and spikes are the perfect way to add texture and dimension to your lash map.
Whether you opt for a wispy, cat eye, doll eye, or spiky mapping, the key is to achieve a balanced, textured effect that enhances the overall appearance. By following these guidelines, you can create stunning lash extensions that make a lasting impression.
Stay connected with us on Instagram for the latest updates and a daily dose of beauty inspiration!
MAYBE YOU WANT TO KNOW MORE:
A Deep Dive Into Wispy Lash Mapping Styles
Wispy Lashes Vs. Anime Lashes: Finding The Perfect Look For Your Eyes
Face off: Hybrid lashes vs Wispy lashes – Which style is the winner of lash game?
Wispy Lash Extensions – How To Create This Look – CharmLash


