The holiday season is all about sparkle, magic, and celebrating in style. What better way to embody the festive spirit than with glitter lash extensions? If you’re a lash artist or salon owner, adding glitter lashes to your services is a creative way to attract clients looking for a glamorous holiday look. This guide will show you step-by-step how to create stunning glitter lash extensions perfect for Christmas.
What are glitter eyelash extensions?
Glitter lashes were once primarily associated with fantasy lash designs crafted for competitions. But these days, they’ve become a year-round trend, especially during festive occasions like Halloween and, most notably, Christmas!
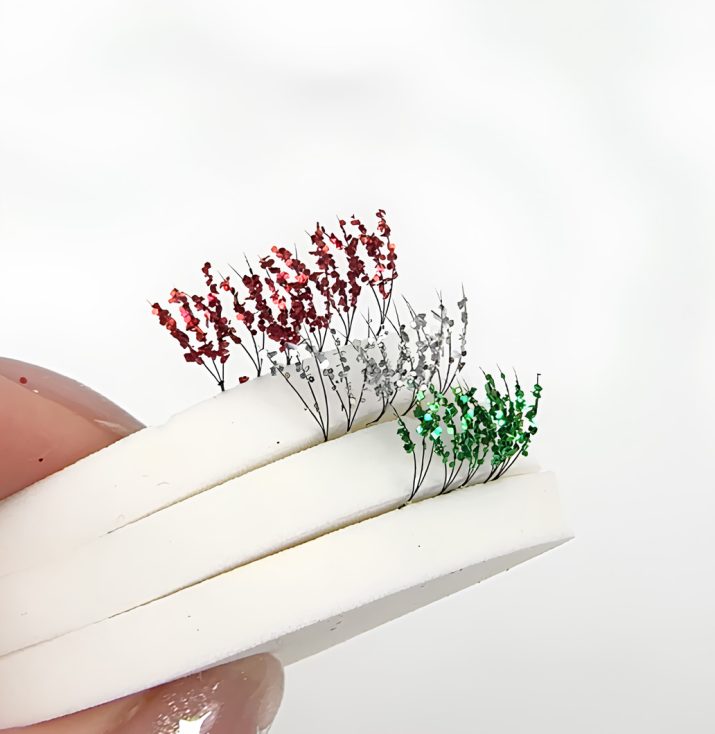
Think of glitter lashes as the enchanting touch that takes regular eyelash extensions to a whole new level of magic. They’re the ultimate festive beauty statement, combining the elegance of traditional lash extensions with vibrant holiday hues like red, green, and gold.
When a client steps into a room wearing those dazzling lashes, they won’t just catch people’s attention—they’ll spark conversations. And isn’t that the essence of the holiday season? A dash of drama, a sprinkle of sparkle, and an abundance of joy!
Who are suitable for glitter lashes?
As we mentioned, glitter lash extensions are now more commonly associated with festive celebrations like Christmas or Halloween, adding a vibrant splash of color to the winter season.
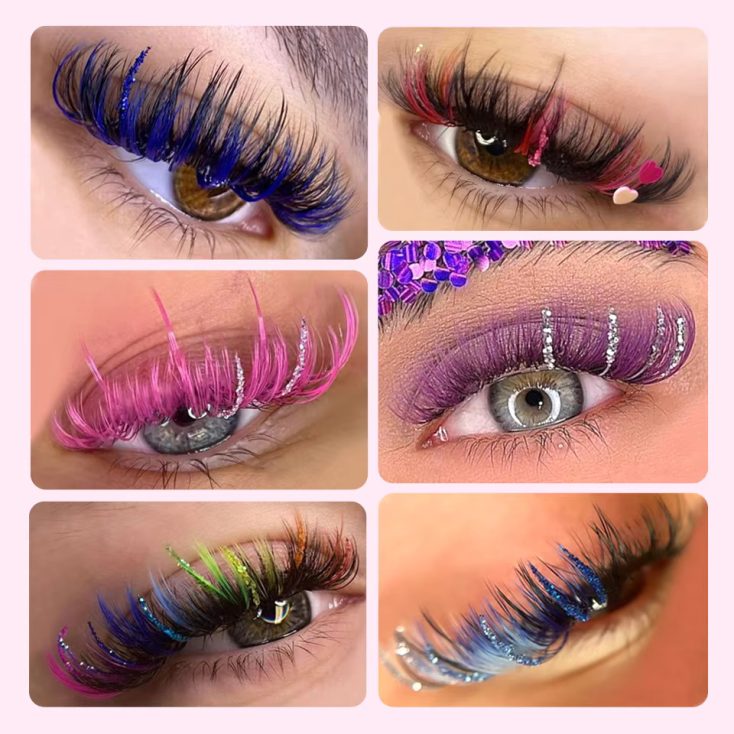
However, glitter lashes aren’t just for the holidays—they’re a fun and creative option all year round! They’re especially popular for clients attending music festivals, Pride events, or any occasion where they want to make a bold statement. With glitter lashes, the possibilities are endless!
It’s important to note that glitter lash extensions won’t achieve a natural, understated look. This is something to discuss openly with your client beforehand. While the amount of glitter used can be tailored to their preference, these extensions are meant to be bold, playful, and packed with personality.
How to make glitter lash extensions?
Step 1: Start with a consultation
First things first, take the time to chat with your client and assess their facial structure. This helps you pick the right lash length and curl to flatter their natural lashes. For something special, especially around the holiday season, why not try adding some red and green lashes? They’ll definitely give off those Christmas vibes!
Step 2: Gather your supplies
You’ll need a few essentials to get started:
- Eyelash Extensions: Pick any lash type that fits the style you’re going for—whether it’s classic, volume, or something a little more dramatic.
- Glitter: Choose your favorite glitter! You can go all-out with sparkly red or green, or keep it simple with a neutral shimmer.
- Glass Dish: Pour your glitter into this for easy access.
- Tweezers: A trusty tool for applying lashes. If you’re creating volume fans, make sure your tweezers are perfect for that technique.
Step 3: Apply clear lash glue to lash extensions
Now, take your tweezers and grab a single lash, fan, or spike (whatever you’re in the mood for). Dip the tips of the lashes into invisible lash glue. The clear glue is perfect because it won’t interfere with the glitter’s shine and will hold it in place.
Step 4: Dip into glitter
Here’s where the magic happens! Carefully dip the glue-coated lash into your glitter. Give it a little tap to remove any excess glitter, so it’s evenly distributed and not too heavy.
Step 5: Let it dry
Let the glitter lash extensions dry completely before you move on to the next step. You want to make sure the glitter is securely attached to the lash, so it stays in place during application.
Step 6: Apply the glitter lash extensions
Once the false lashes with glitter are dry, it’s time to apply it to your client’s natural lashes! Use the same technique you would with any other lash extension, placing it carefully where it belongs and letting it bond.
And that’s it! You’ve just created stunning glitter lash extensions that will sparkle and shine. Perfect for adding a little extra glam this Christmas or any special occasion. Want to see it in action? Check out the video below for a live demonstration of this technique:
It’s really that simple—and your clients are going to love the sparkle!
Inspiration for glitter lash extensions
Glitter lash extensions are a great way to enhance any lash look or eyelash extension style. You can add some sparkle to colored lashes by creating spiked accents on the outer corners or scatter glittered lash fans throughout the set. For a festive touch, mix red and green glitter for a bold, eye-catching effect. You could also add glitter to the spikes for a Mermaid or Manga lash look—perfect for a subtle shimmer.
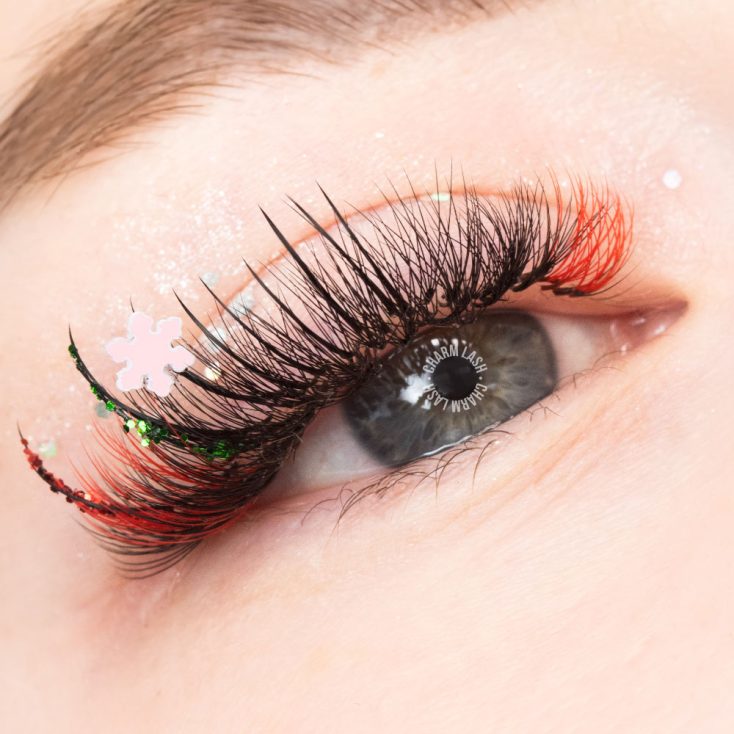
The possibilities are endless, and you can customize the design to suit your client’s preferences and your own creative vision. There’s no one-size-fits-all approach to this technique, so feel free to experiment!
Important considerations for glitter eyelash extensions
1. Always use professional eyelash glue
When working with glitter and adhesives around the eyes, safety should always come first. Always use a professional eyelash glue, just like you would with any other lash set. This ensures the glue is safe, reliable, and will keep everything in place without any worries.
2. Safety comes first
Remind your clients that while eyelash extensions with glitter are stunning, they do require some extra care and maintenance to protect their natural lashes. Glitter lash extensions are not meant for long-term wear and should only be used for short periods, such as for a special occasion. The glitter may come loose and potentially get into the eyes, and the extra weight of the glitter can put strain on the natural lashes.
3. Schedule a removal appointment
If your client is wearing glitter lash extensions for a special event or social media content, make sure to book a removal appointment as soon as possible. After removing the glitter false eyelashes, you can replace them with classic black lashes or a vibrant colored set to keep the look fresh.
If your client can’t make it in right away to have the glitter lash extensions removed, advise them to use lash shampoo, such as our Basic Scent Lash Foam Cleanser to clean the area around the glitter gently. Since the glitter covers only part of the lash set, they can clean between the lashes without scrubbing too harshly.
It’s crucial to show your clients the correct cleansing technique to ensure proper aftercare. This helps maintain the health of their lashes and keeps them looking beautiful after the glitter lash extensions are removed.
Wrap it up
Glitter lash extensions aren’t just a holiday trend; they’re a way to showcase your client’s unique style and your expertise as a lash artist. With the proper techniques and safety measures in place, you’ll be ready to craft stunning, festive lash designs. This Christmas, ditch the ordinary and embrace the sparkle. Let the glitter shine and make those lashes dazzle!
And don’t forget to follow us on Pinterest & Instagram for more helpful lash tips!
MAYBE YOU WANT TO KNOW MORE:


