When it comes to lash extensions, the curl type is one of the most important factors in achieving the desired look for your clients. Among the various curls available, C and D curls are the most popular. But how do you create a lash map that perfectly balances these two curl types?
This guide will walk you through the key techniques and tips for mastering C and D curl lash map, helping you enhance your clients’ eyes with precision and style.
Understanding C and D Curl Lashes
Before diving into C and D curl lash map, it’s essential to understand what sets C and D curl lashes apart.
C Curl Lashes
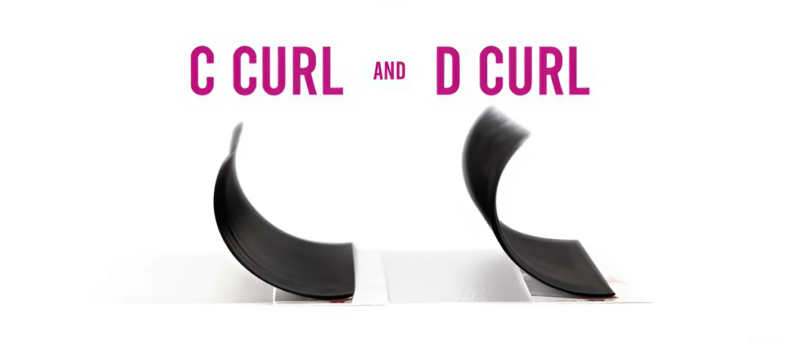
C Curl lashes are favored in lash extensions for their distinct features and curve that resembles the shape of the letter “C”. With a short, straight base and a gentle, medium curl of about 60 degrees, they gradually lift towards the tip, subtly enhancing the eyes’ appearance
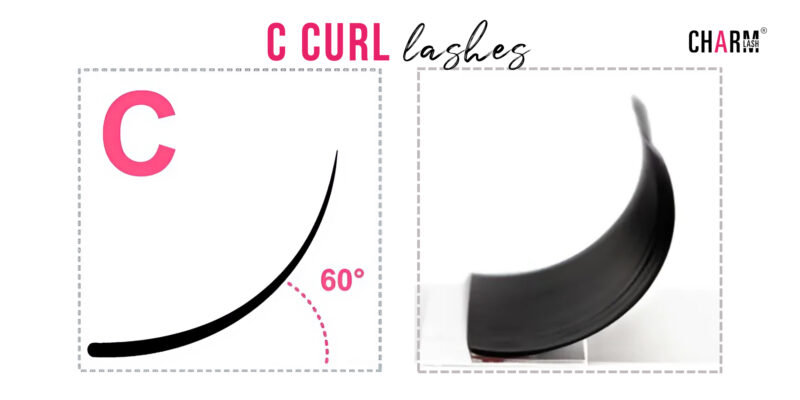
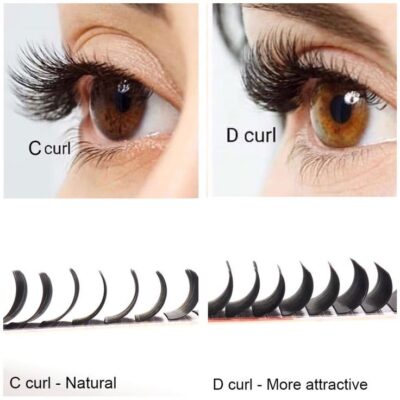
C curl is ideal for clients who desire an open, awake look without the drama. They mimic the natural curve of most lashes and work well for everyday wear.
D Curl Lashes
D Curl Lashes are known for their dramatic, upward curve, making them ideal for clients who want a bold, glamorous look. The curl measures around 70 degrees, closely resembling the letter “D,” which provides a bold lift and enhances the eyes’ overall look. This curl is especially effective for clients with naturally straight or downward-facing lashes, as it helps to open up and elevate their gaze.
For more, read our blog about: D Curl Lash Mapping: Quick Pro Tips.
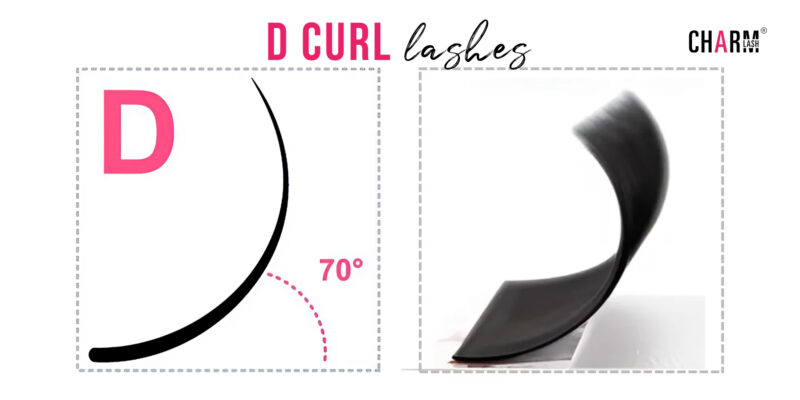
The sharp curve of D Curl lashes creates a striking effect, setting them apart from other curls like C Curl, which offers a more subtle lift. D Curl is perfect for creating high-impact looks that demand attention and add a touch of drama to any style.
Why Mix C and D Curl Lashes?
Both C and D curls have their unique strengths, but when combined, they can create a beautifully balanced look that enhances the natural eye shape while providing depth and dimension.
Mixing C and D curl lashes allows you to customize the look to suit your client’s eye shape, lash line, and personal preferences. Whether your client wants a subtle enhancement or a bold, glamorous look, mixing these two curls provides the flexibility to achieve various styles.
How to Create a Perfect C and D Curl Lash Map
Now that we’ve covered the basics, let’s get into the practical steps for creating a C and D curl lash map that will wow your clients.
1. Assessing the Eye Shape
Before you start mapping, it’s crucial to assess your client’s eye shape. The way you mix C and D curls will depend largely on this factor. Here’s a quick guide:
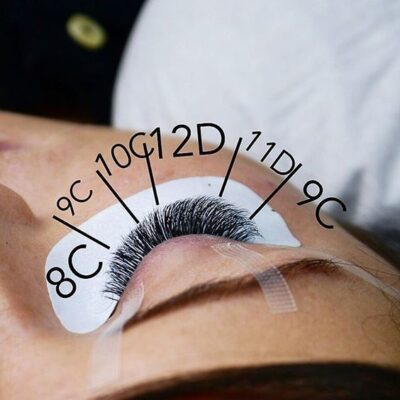
- Almond Eyes: Almond-shaped eyes can handle a variety of lash maps. A mix of C curls on the inner corners and D curls on the outer corners works beautifully to enhance the natural shape.
- Round Eyes: To elongate round eyes, use C curls in the inner and outer corners, and D curls in the center. This creates a more oval appearance.
- Hooded Eyes: For hooded eyes, focus D curls on the outer edges to lift the eyes and avoid using too much volume on the inner corners.
- Downturned Eyes: D curls are your best friend here. Use them on the outer corners to lift and open up the eyes. C curls can be applied to the inner corners for a natural transition.
Discover more eye shapes in our guide here: Eyelash extension shapes: Best Lashes for Different Eye Types
2. Choosing the Right Lengths and Thicknesses
Length and thickness are key to achieving a balanced look. Here are some tips:
- C Curl Placement: Start with shorter lengths (e.g., 8-10mm) on the inner corners using C curls. This gives a natural lift without overwhelming the eyes.
- D Curl Placement: Gradually increase the length as you move towards the outer corners. D curls should be longer (e.g., 12-14mm) to create that dramatic, eye-opening effect.
- Thickness: For a natural look, use 0.10-0.12mm thickness. If your client desires a bolder look, you can go up to 0.15mm, but be mindful of the natural lash health.
3. Mapping the Lash Line
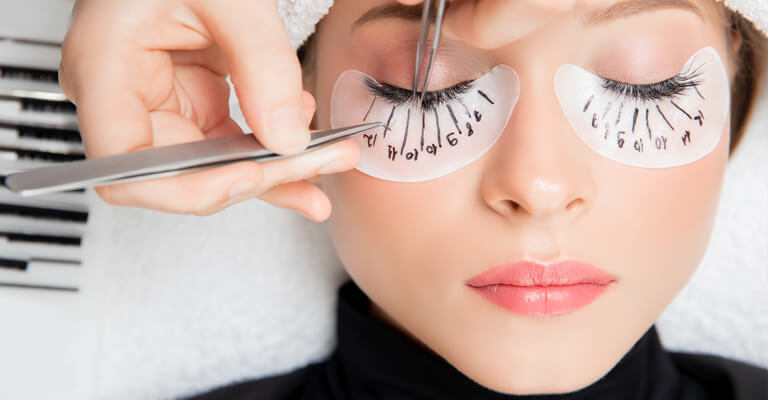
When it comes to mapping, you want to ensure a smooth transition from C to D curls. Here’s a simple mapping strategy:
- Inner Corners: Start with C curls in shorter lengths. This helps maintain a natural look and ensures that the lashes aren’t too heavy in the inner corners.
- Mid to Outer Corners: Gradually transition to D curls, increasing the length as you move outward. This creates a seamless flow from a subtle lift to a dramatic flair.
- Outer Edges: Finish with the longest D curl lashes on the outer edges to give the eyes a lifted, elongated appearance.
4. Blending and Balancing
One of the challenges of C and D curl lash map is ensuring that the final look is cohesive. To achieve this, focus on blending the curls where they meet. You can do this by:
- Staggering Lengths: Avoid abrupt changes in length between C and D curls. Instead, stagger the lengths slightly to create a more natural transition.
- Using Different Curl Ratios: If your client’s natural lashes are more suited to C curls, you can use a higher ratio of C curls, with D curls as accents. Conversely, if they prefer a more dramatic look, use more D curls.
- Layering: For added depth, consider layering the lashes. Place shorter C curls underneath longer D curls to create a multi-dimensional effect that’s both natural and striking.
Common Mistakes to Avoid
While mixing C and D curl lash map, there are a few common mistakes to watch out for:
- Overloading the Lashes: Avoid using too many heavy D curls, especially on clients with weaker natural lashes. This can cause strain and potentially damage the natural lashes.
- Uneven Mapping: Ensure that the transition from C to D curls is smooth and even. Uneven mapping can create a disjointed look that detracts from the overall effect.
- Ignoring Eye Shape: Always tailor your lash map to the client’s eye shape. A one-size-fits-all approach doesn’t work with lash extensions, especially when mixing curls.
Best inspiration for C and D curl lash map
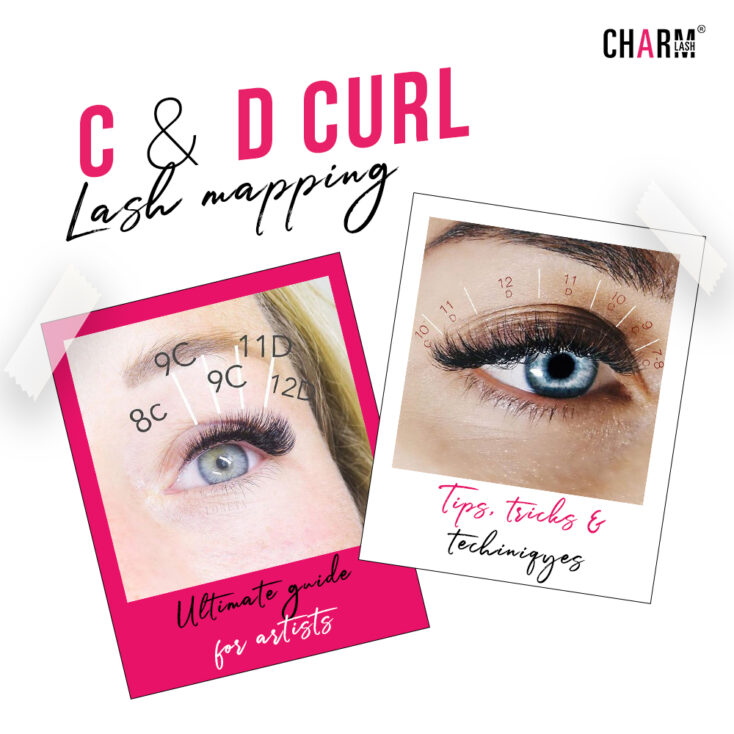
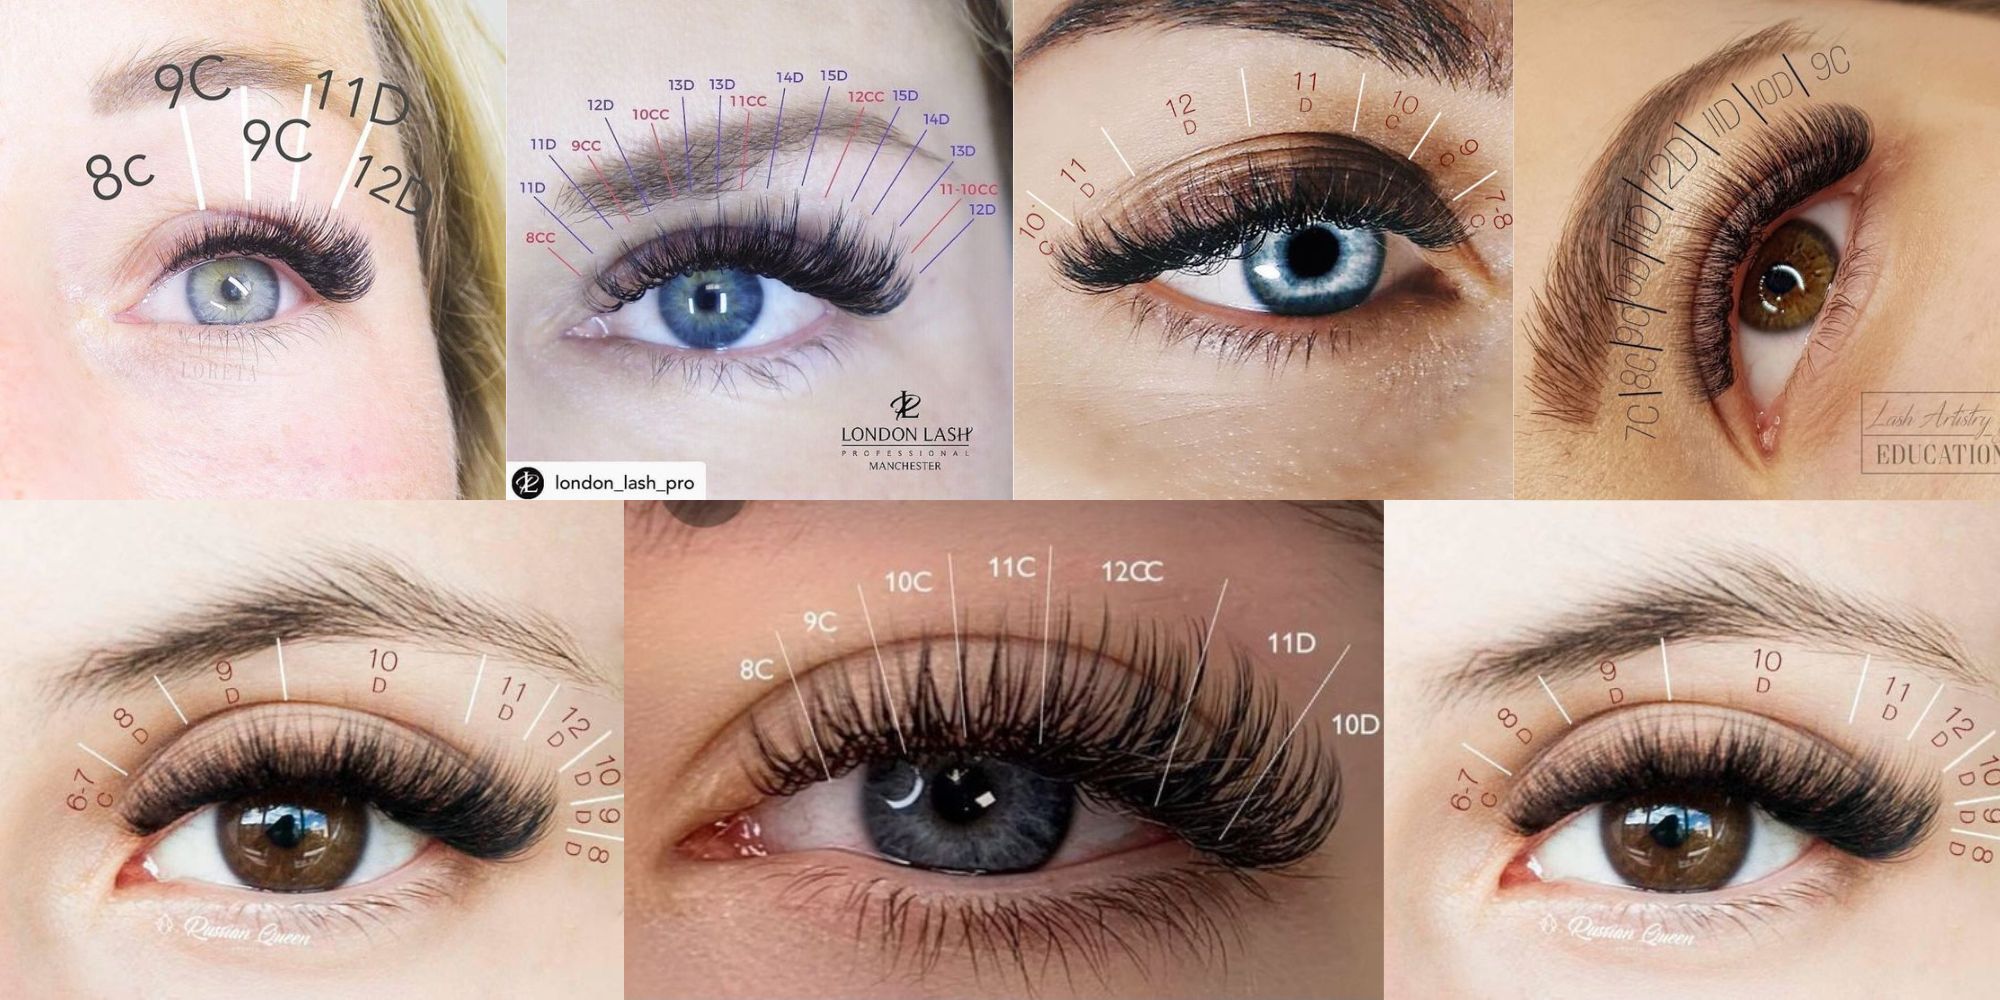
Feel free to adjust C and D curl lash map based on your client’s eye shape and personal preferences. By mixing these two curls together, you can create various lash set like Cat eyes, Kitten eyes, Wispy lash mapping or anything your clients wish for!
These C and D curl lash maps here are some inspiration to ihelp you create stunning lash looks:
Source: Pinterest
Conclusion
Mastering the art of C and D curl lash map is all about understanding your client’s eye shape, lash line, and personal style. By carefully blending these two curls, you can create a wide range of looks, from soft and natural to bold and dramatic.
With these tips and techniques, you’ll be well on your way to creating stunning lash maps that leave your clients looking and feeling fabulous.
Stay tuned for more lash beauty tips by following us on Instagram!
MAYBE YOU WANT TO KNOW MORE:


