
High‑quality lash photography isn’t just a nice‑to‑have for your lash brand—it’s a business essential. In a market where buyers rely almost entirely on visuals to assess lash lengths, curls, and quality of the lash materials, high quality images build credibility and drive purchasing decisions. Whether you’re a salon owner vetting new lash stocks, online lash retailers crafting product listings on e-commerce sites, or a lash brand owner trying to level up your game on social media, having professional‑looking lash photos will strengthen your brand, empower confidence, and – ultimately boost the bottom line.
1. Understand your audience and platform
Before hitting the capture button, pinpoint who will view your lash photos—and where. Are you showcasing lash fans to salon owners that need detailed lash product descriptions? Or inspiring lash artists on Instagram? Or maybe you’re uploading lash photos onto e-commerce listings that demand clean and consistent product views? Each audience segment needs different ways of displaying products, and doing some research beforehand would benefit you greatly in the long run! Let’s look at some of the examples, shall we?
- Say if you are an online retailer, you’d want to customize your lash photos, so they are of uniform and consistent sizes and fit seamlessly into your product grids. Web product pages, for example, benefit from high-resolution and zoomable images, ideally against a neutral backdrop – which we’ll cover later in the article.
- And if you run a salon, you might need clear, clinical shots highlighting lash lengths, curls and thickness.
- Or if you want to post your lash photos on social media, coming up with different lash photo concepts would be a great way to attract attention and increase reach. While you’re on social media, we’d suggest keeping your lash photos in square or vertical formats for optimization.
Having said that, aligning your content with your audience’s expectations for different platforms provides more opportunities for you as a lash business owner to maximize impact and potentially turn product browsers into your customers.

2. Invest in the right equipment
You don’t need the most expensive gear for the best lash photos, or any photos ever – but we think having the right tools matters. Here is some of the necessary equipment that we think you’d need for your lash business:
- Camera vs. Smartphone: We all know modern smartphones (iPhone Pro and Google Pixel for example) can capture excellent macro details. So, if you’re using these, just be sure to disable filters and set manual exposure where possible. And if you’re considering having a camera – having a mirrorless camera (anything from the Sony α7 series) paired with a macro lens (50-100mm) will deliver superior sharpness and depth‑of‑field control for your lash photos.
- Macro accessories: If you want to achieve great detailed close-up shots, having clip-on macro lens for phones can be a great option. For DSLRs or mirrorless cameras, a dedicated 50-100 mm macro lens would enable 1:1 reproduction.
- Stabilization: Having a sturdy tripod or a tabletop rig minimizes shake. If you want to go with the smart phone option, you can consider purchasing a small tripod for your phones to easily adjust angles and prevent having blurry lash photos during production.

3. Use proper lighting
We all know light can shape our perceptions of things. So, taking light into consideration when taking lash photos is something you’d want to be mindful of. Here, let us break down some of the options you can have when it comes to lighting:
- Artificial light: this is the recommended option when it comes to taking lash photos as it ensures consistent lighting throughout your photoshoot. Ring lights can produce even illumination, accentuating lash curls and volume without heavy shadows. On the other hand, soft boxes offer more directional control and are excellent for flat lays of multiple lash trays.
- Consistency: remember to match your white balance across sessions (e.g., 5600 K or anything from 200W for daylight LED bulbs). Also, you’d want the CRI of your lightbulb to be at least 90. CRI (Color Rendering Index) is a measurement of how natural colors render under an artificial white light source when compared with sunlight. Consistent lighting ensures that your lash products and packaging are unified in media galleries and catalogs.
- And if you don’t have a dedicated studio to take your lash photos yet, natural light can be a great option as soft and diffused window light is ideal for true‑to‑life color. In case when there’s not much light inside the room or it’s just simply a gloomy day, you can use a white reflector or foam board opposite the window to attain more light and fill shadows.

4. Master the background & setup
If you want your potential customers to pay attention to your lash products. Having a clean background would steer the focus on your lashes. Here are some of our suggestions when it comes to background and setup:
- Neutral Backdrops: Having white and grey backgrounds can create contrast—white for dark lashes and grey for light or colored varieties. Otherwise, branded color boards can add personality but remember to keep them uncluttered.
- Styling Props: Acrylic lash trays, clear lash palettes, minimalistic holders, and podiums make your lashes collection stand outs and add more structure to your lash photos. You can use simple props like tweezers or a lash curler to suggest use without overwhelming the frame.
- Composition Tips: For dynamic layouts, apply the rule of thirds. For flat lashes, you can arrange lash trays in a gentle arc or grid, leaving breathing space around the edges for cropping or overlaying text in the editing process.

5. Choose the right angles
When it comes to photo angles, having different angles is necessary if you want to display and tell different stories of your products. We’d recommend you to have a play with how you position your camera angles. You can always edit or remove your photos to your liking in the later stage of the production. In the meantime, if you need some suggestions, we’d recommend some of our favourite angles:
- Top‑down for flat lays: Ideal for catalogs, shows the full spread of trays or packaging.
- 45° for depth: Highlights curls and fiber texture—position the camera slightly above tray level.
- Side‑on for lash curls: you can place a single lash or fan upright against a neutral surface to accentuate the curl profile in silhouette.

6. Focus on details & texture
When it comes to lash extensions, details play a vital role in the make or break of the purchasing decision. So make sure you focus on the details and texture of the lash fibers, and whether they have a matte or glossy finish.
- Macro close‑ups: remember to zoom in to reveal the tapers and the base the lashes as well as how they’re boned. You can use a narrow aperture to keep the entire fan in focus.
- Texture Contrast: Each lash material comes with a different finish. Some appear more matte than the others, and some are more glossy. So if you can capture these into your photos – your lash photos would look more 3D and reliable to the viewers. A slight side‑lighting can emphasize texture without flattening the image.
- Precision Shots: another option is to show uniform spacing of fans for consistency—this is critical if your clients are lash artists who are looking for premade lashes options.

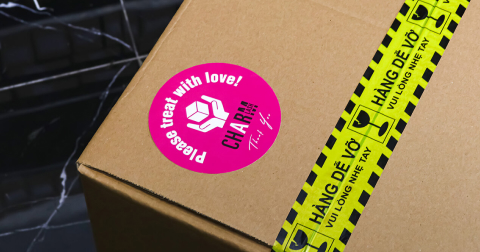
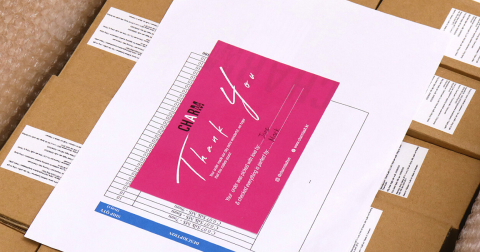
7. Don’t forget to invest in your lash packaging & branding
Your packaging is part of your brand story. And how you choose your packaging design affects how customers view you and your products. When you invest in lash packaging design, you don’t only raise brand visibility but also recognition both online and in-store. You can use the same color palette, fonts, and logo positioning across all of your lash photos. Consistent branding undoubtedly fosters instant recognition in crowded social feeds and product galleries.
If packaging is something that you’re struggling with, you can check out our lash packaging box collections. We can always customize packaging and lash extensions for you!

8. Last but not least, edit professionally but authentically
Enhancement, not alteration, sells true quality. In this final production, we’d want to highlight the most important thing when it comes to doing business – edit your lash photos in an authentic fashion, not alteration.
- Basic adjustments: remember to crop to frame, straighten horizon lines, adjust exposure and contrast to match the real looks and feels of your lashes.
- Avoid over‑softening: Heavy skin‑smoothing or bloom filters of your lash models obscure lash texture. Don’t forget to keep edges crisp and fibers distinct.
- Editing software: when it comes to software, there are many options available for you on the market. Some are beginners friendly; some are more advanced and need a little bit of a learning curve. When it comes to professional editing software, we personally would recommend the Camera Raw function in Photoshop and Lightroom if you want your lash photos to be professionally edited.
Have we covered all the necessary tips for your next lash photoshoot? If you’re still wondering and need a little bit of inspiration for your lash photos, don’t hesitate to reach out to us, or you can simply go over our lash products on our website or our Instagram page for more ideas!
Check out our lash collections and products for more ideas:
https://charmlash.com/wholesale-eyelash-extension-manufacturer-our-stores/